Monday, July 18, 2016

Finally...A loose tooth!

My son is 7 years one and half months old and FINALLY for the first time in his life,
 he has a loose tooth!
This is very big news around here!
He has been waiting for this day and so have I, for a long time. 
He has watched his older sister time and time again, loose teeth and then get paid for them all. 
Meanwhile, he got nothing and just kept getting told, 
"Yours will fall out eventually. You will just have to wait!" 
He watched all the kids in his first grade class loose teeth and saw it posted on the chart in the classroom and his name never got filled. 
Poor little guy!
But your time is coming buddy! 


Last Thursday, we went to to Fred Meyer to shop for our upcoming camping trip. 
As soon as we walked in the door, my son asked if he could go to the bakery for a cookie. 
I pointed to a sign offering children free healthy snacks in the produce section. 
Fred Meyers has started an awesome new snack program for children. While they still offer free cookies for shopping there, they also now offer fresh fruit as well.
I told my son to have an apple. Maybe it would make a tooth loose. 
He grabbed one and within minutes what do ya know?
"Mommy my tooth is loose! Look! I can wiggle it"!


Yay! Super Awesome! Fantabulous!

I was starting to wonder if one would ever fall out. 
He keeps telling me to yank it out. 
I keep telling him no. It will fall out when it is ready. 
You've waited 7 years, 1 month and 9 days.
 What's another day or two? 
Patience, my son with the wiggly tooth! 
Patience! 

An Unexpected Visitor Episode 4

While camping, we seem to always be lucky to "stumble upon" the most interesting creatures.


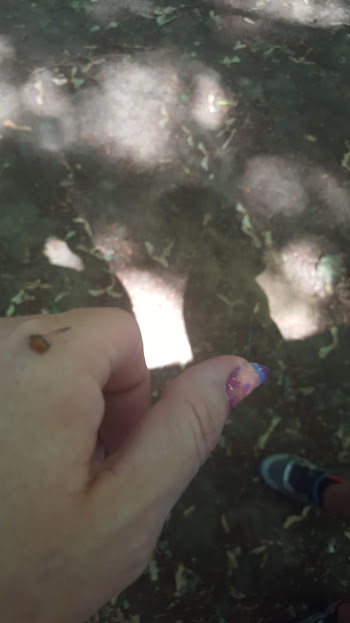
My son was greeted by a lady bug. This poor lady had a broken wing, but still was in good enough spirits to stop and say hello. She welcomed us to our campsite and really reminded us as to how happy we were to be there. 

She really liked my son. 

And...

He really liked her!


She liked me too!

If that wasnt enough of an awesome event,,,


 A few minutes later, a tiny baby lady bug came right up to him as well. 
Awesome!
Seeing my son smile and catching it on camera is something I find especially joyous!
Seeing him interact with nature, being patient, and happy about it is one of the main reasons we continue to go camping as often as we possibly can. 
That smile says it all! 

Bonus visitor!
Before we left, as we were packing up, my son called me from across the campsite. He was standing there very still, in awe.
He had spotted a blue dragonfly! 


I love that he gets so excited and really wants to be there,
 in that moment, 
experiencing nature and new things. 

Thankyou, unexpected visitors. 
You made this little boy happy again and again! 

Chicken Dinner Mondays-BBQ Ranch Chicken Sandwiches

I happened to make this while camping. 
A delicious grilled chicken sandwich with bbq sauce, bacon, cheddar cheese, and onion rings. 
Yes, I made onion rings while in the woods!
Hubby was very happy. 
So, if I can do this easily while camping, it can be done even easier while at home. 
Regardless of whether you are home, or camping, this  will cure any craving for a big, juicy chicken sandwich that is full of flavor. 


Mom's Bags of Tricks' BBQ Ranch Chicken Sandwiches
Serves 4 

Onion Rings 

1 cup flour 
1 tsp baking powder 
salt, pepper, seasonings to taste 
1 egg 
1/4 cup ranch dressing 
2 tbsp milk 
1 cup panko bread crumbs 
1 onion, cut into 1/4 inch rings, patted dry 
oil for frying 


Place flour, baking powder, salt, pepper, and seasonings in a ziplock gallon bag and mix well. 
In a bowl, mix egg, ranch and milk. 
In a second ziplock, place panko bread crumbs. 
Dip onions first in flour mixture, then in egg mixture, then in panko. 
Fry 3-4 minutes on each side. 
Drain on paper towels. 

I fried these in a pan with only 1/2 inch of oil to be safe while in the woods. At home, I would normally use more oil for a deep fry but this way works just as well. 
Because I am cooking for picky eaters, I held back on the sauce on one breast, allowing me to serve my whole family dinner, with some small adjustments. 

Chicken Sandwiches 

2 boneless, skinless chicken breasts, split 
4 slices thick cut bacon, cooked (I cooked it at home and reheated it on the grill) 
salt, pepper, seasonings
1/2 cup bbq sauce, divided  
2 tablespoons ranch 
4 slices cheddar cheese 
4 Pub style buns 


Split chicken in half lengthwise, place in gallon size ziplock bag. Add salt, pepper, and seasonings. 
Preheat and oil grill. 
Place chicken on grill and cook 5 minutes with the lid on. 
Flip chicken over, brush with BBQ sauce and cook another 5 minutes with the lid on. 
Flip chicken and rotate half  a turn and brush with BBQ sauce again. This cooks the chicken evenly while providing nice crossed grill marks. 
Add bacon to the grill to heat up if necessary. Mine was already cooked so it only needed a few minutes to heat up. 
Flip chicken once more and turn once again half a turn for crossed grill marks on the other side. 
Brush again with BBQ sauce and add cheese. 
Cook 2 minutes with the lid on to melt cheese and add buns to the grill so they are warm and toasty for serving. 


I added all but 2 tbsp of the bbq sauce to a cup for basting on the grill. To the 2 tbsp of BBQ sauce, I added 2 tbsp ranch dressing and spread on the bottom buns. 


Then, I built this amazing chicken sandwich by adding the bacon, a large onion ring, and drizzled with both BBQ sauce, and BBQ ranch and served with the extra onion rings on the side. 


Enjoy! 
While camping, or while not camping!
This is easy enough to make just about anywhere
 and 
awesome enough to impress just about everyone!


Sunday, July 17, 2016

Perseverance

This weekend, I was reminded of what it means to persevere. 
I was reminded to never give up, no matter the circumstances. 
I was reminded if I want something, I need to go for it. 
I was reminded to keep trying in everything I do. 

The wind was whipping quite furiously at the campground we were at. 
I mean, they don't call it Viento State Park for nothing. 
Viento means wind in Spanish. 
And that park was perfectly named. 


It is on a busy train line and right next to the highway. 
Still, it is packed every weekend. 
The campground is in the Columbia River Gorge so no wonder campers dont care about the noise. 
They are too busy thinking about the water. 

Viento State Park has an excellent shore perfect for windsurfers. 
People are obviously passionate about their watersports. 
They will go to great lengths to feel the wind whipping through their hair. 
They want glide across the water like they are flying. 

And then there was this guy. 
With his wind kite surfing apparatus. 


As I said, it was super windy when we walked down there. It was warm but not swimming weather. 
The waves were moving too fast to let my kids in the water to play. 

We were about to leave because we weren't doing any water sports so the wind was too much  for us. 
We just wanted to get away from it.  

Some people, unlike us, chase the wind. 

Like this man...


We had to stay and see how exactly he would do this. 
He had no one to launch him. 
The wind was ridiculous. 
He did not care. 
He needed his wind kite in the water regardless of the obstacles he faced. 

He had the kite tied to a log near us. 
He ran and placed it in the water, trying to get it to stand up. 
Then he ran back to untie it. 


Fail! 
The kite fell over. 
The wind was perfect for this sport, but  was also what was stopping him!
He ran back to fix the kite again. 
and ran back to the water. 


Success! 


He did it!
All by him self!
He was determined. 
He was not going to give up!

And so...
He persevered!

He started gliding across the water like he was flying. 


He reminded me to not give up. 
On anything. 
Even if I have to do it alone. 
If I want it, 
I need to make it happen. 
It will all be worth it in the end!


Perseverance. 
It is amazing what you can do when you keep trying. 


Wednesday, July 13, 2016

RiteAid Haul: Clearance and Dollar Sections!

I am not a big RiteAid shopper. I would love to really get into couponing and utilize RiteAid for this purpose but in the meantime, I shop there occasionally for certain things.
What I really love at RiteAid is there Dollar Section. And they have pretty good deals on clearance items as well.
Let's get into the haul!
I needed a few things for camping, and the dollar section is a great place to check.


The Dollar Section 


This is a great place to get some food items. Powdered drink mixes for water bottles, pretzel rods, trail mix and chocolate covered almonds and cashews are great for camping. 
This small bottle of syrup is plenty for a weekend camp trip and saves space and can be refilled at home as needed. 


Face wipes are a great add for $1 and so are these pot holders. 

Clearance Section 


I really scored in the clearance section. Everything offered was 75% off.
These Tide laundry packs are great for camping. If my child has an accident, we can clean it quickly and get everything on the clothes line to dry. I paid .35 cents each. 
The Aleve PM was such a good deal. This box was originally 9.99. I got it for 2.50 


The Sour Patch candies are usually about $1. I got these for .84 cents each. 


My favorite item from this haul:
The Aleve. It was already on my list. I saved 75% off, just for looking in the clearance section!
Score! 

Time for a Garden Update

I guess I should just come right out with the bad news...

My neighbor Chere is gone on vacation. 
I'm not sure she saw this....


Those landscapers should really be using Google on their job more. How many times will they do this to us in a lifetime? Botany classes should be a prerequisite for anyone applying for a landscaping job!
This is the side of her house and used to be covered in flowers. There were some weeds as well, but it looked a lot better than this!

Sorry Chere!
But there is good news!


Connor's sunflowers are enormous! 


Top view of the sunflower. I had to point the camera all sorts of weird ways considering I'm short and these sunflowers are not short at all!


Chere, these are the seeds from April. So many different varieties are coming up and you aren't here! This is in front of your house. 

I feel like THE SUN really needs to start shining around here. 
So many obstacles this summer are getting in the way of a beautiful garden.   


I think my snap peas need emergency surgery ! And lots of sun!

This poor guy is in the same situation...


More surgery and sun needed here!

It's not all bad. 
Somethings are doing quite well...


Beautiful!


Carrots are coming up. These are multicolored carrots. I thought that would be fun. 


These pretty yellow flowers are new blooms this week. 
Watching the garden grow and reveal new flowers is pretty fun. 


Blueberries, boysenberries, and strawberries. 


Lots of cherry tomatoes are getting ready to ripen. 

Its hard to grow a garden properly without an adequate amount of sun. 
Where is our summer? 
Finally, this week, its predicted to be above 80 degrees. 
I want warm weather and the summer sun to beam down upon me and my lovely garden. please!


Tuesday, July 12, 2016

More gradient nails!

When it comes to trying something, or anything, practice makes perfect. It is a rule and a code to live by. 
Even if its something like doing your nails. It takes practice. Lots of it. 
I have tried gradient nails twice more since my last post on this topic. 
To read my last post on gradient nails, where I try 3 times, click here . 
So I tried again, last week, and even though I wasnt really going for a patriotic theme, this is what I ended up with...

I did better with the placement of the polish this time, using a makeup sponge. 


But the hardest part for me actually, is cleaning up and staying neat in the first place. 
I bought a new nail polish remover specifically for gel nails and glitter polish. It did help but, still I needed to get neater. 

So I tried again, yesterday...

This time, I tried a tip I saw on YouTube by using eye shadow applicators on all my nails except my thumbs. 
I also used a peel off base coat around my cuticles. 
This is how well I did! 
 After cleaning...


I feel like the eyeshadow applicators work awesome as far as keeping the polish neatly on the nail, but the effect with the makeup sponge is better. There is a more or a defined line when using an eyeshadow applicator. Which if you want a crisp tip or strips, this would be an excellent choice to help you out. 

The more I try these nails, the better I get and the more ideas I have. 
My focus for now is getting them clean around the cuticle and really sharpening up the lines. 
Simply Nailogical is a great resource for gradient nails. She has taught me alot.
Check out her videos here
Her latest video is a great resource for how to make your manicure last longer. 
Check out that video here.

I am happy with my progress at doing my own nail art. 
As a former gel nail wearing-salon visiting-addict, I am happy to do my own nails and proud I keep getting better. 
Practice makes perfect!